Facies Map
Facies Map
Facies Map can show us facies distribution in a plane. In GES, you can perform facies map manually or automatically.
When generating facies map automatically, GES adopts an intelligent mapping algorithm, patented by GPT Software. The algorithm has 4 steps:
1. Create main line according to source direction.
2. Create auxiliary line according to channel length-to-width ratio.
3. Use main line and auxiliary line to create facies boundary.
4. Repeat until all facies boundaries have been created.
Facies priority sequence can be set to make sure the main facies distribution will not be affected by other facies.
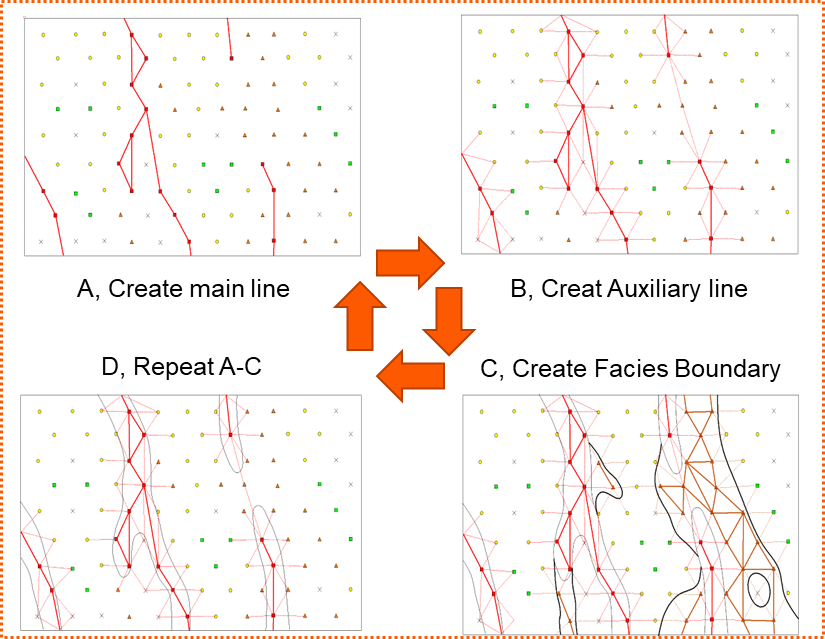
Fig. Intelligent mapping algorithm
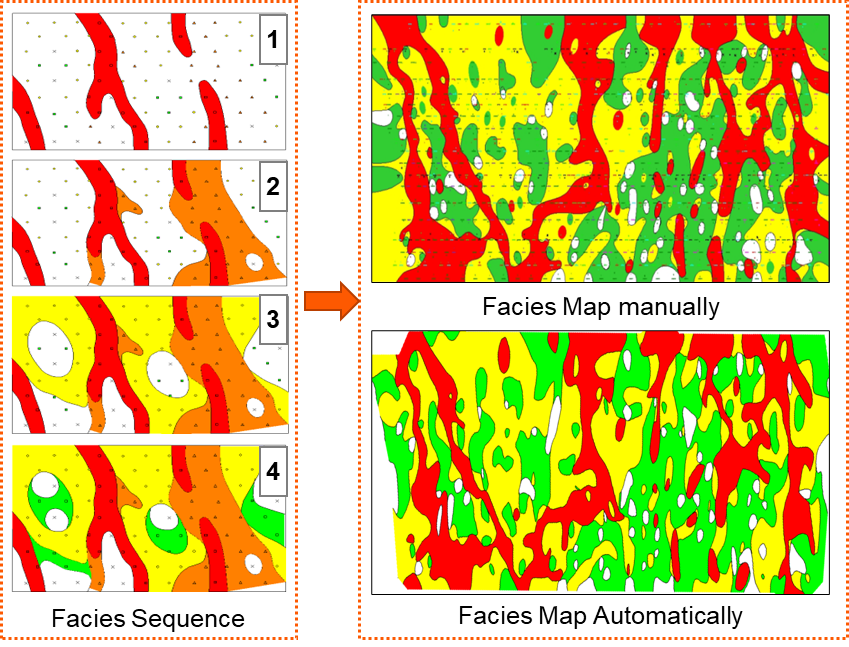
Fig. Facies sequence (left) and comparison between facies result (right)
Steps to perform Facies Interpretation in GES:
· Get facies result for zone from facies log: Go to Data Pane → Click Stratigraphy → Right Click→ Click Property Calculator → Input Property Name (for example, Facies1) for facies → Select Discrete for Type → Select Stratigraphy Scheme → Choose To Zone → Select facies log for Log Name → Select facies attribute you want to analysis → Select Most of Algorithm → Click OK
· Go to Geological Evaluation scenario/Geology & Modeling Scenario → Geology Evaluation → Facies Map
· Select the zone → Select facies result calculated in step 1 → Click Automatic → Set Connection Radium and Source Direction → Choose Boundary → Input facies layer → Click OK
· Or Select the zone → Select facies result calculated in step 1 →Click Manual → Choose Boundary → Input facies layer → Click OK → Click New on the ribbon bar → left click and draw facies block in the window → choose one facies attribute in Facies Fill ribbon bar → click the facies block, the block will be assigned facies attribute
Message